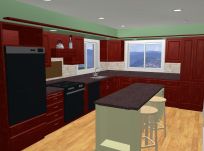
The goal of putting the beam in was to create a simple visual boundary between the kitchen and the dining area, and break up the ceiling. It also makes the kitchen feel a bit more rustic.
 How to installed beam:
- Mark the ceiling and drill holes for the lag bolts (7 inch long) - I used six to hold the beam. These go into the 2x4 truss above ceiling
- Cut the beam 1/4 inch longer than the space it needs to go into
- Cut a hole in one wall the size of the beam
- Lift the beam, slide it into the hole, bring it up into place, and slide it solid against the other wall.
- Use upright 2x4's on each end (with some small peices of wood for protection) of the beam to hold it into place.
- Lag bolt the beam from above
- Drill and lag bolt the end of the beam that is not in the hole (picture below)
 The bolt will be covered by the crown molding.
The other end sits in hole and "floats". This allows for the beam to expand and contract without pulling away from the wall and leaving a gap. Since I bought "green" douglas fir, I expect a slight shrinkage.
The cost of the 10ft beam and lag bolts $20.


No comments:
Post a Comment